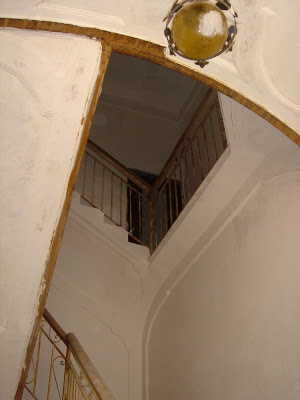
The sleeping beauty is going to wake up ...

... as we are going to kiss alive our sleeping beauty soon !

When winter is fading and spring is awaking we are going to be on site and pushing the interior work.

Meanwhile my duty is to compile a filing that shows what we want to do room by room - colour, flooring, equipment.

This is fun. I have done this before in a digital folder - long time ago - it has survived different laptops and computer - yes, that long ago. I 'just' need to update it and print the relevant pictures and make notes.

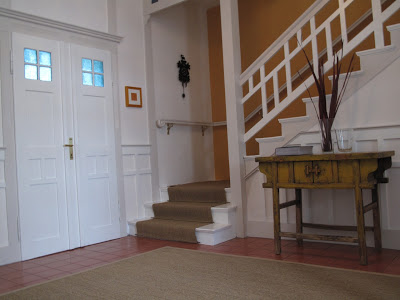
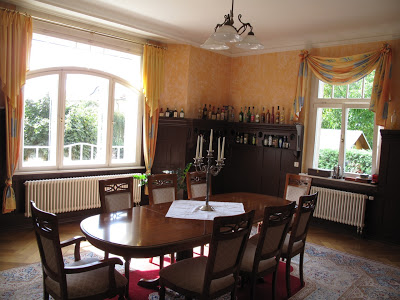
I started with a room, the green room, my readers might be familiar with it. It seems to be my favorite room. No it isn't. It is just the room with most of previous live in it. It is the only room where the pre-owner has kept the original wall and ceiling colour. That's why it feels most lively. All other walls were tainted white when we bought the house.

Here the start of my brainstorm for the room by room folder :

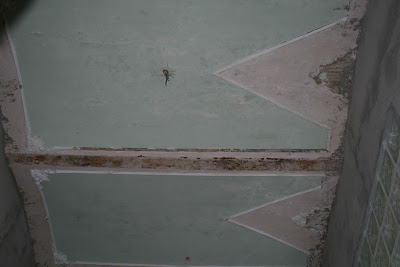
ceiling now - after adding a wall

my idea of renovating the ceiling :
neglect the cutted ornament; model simple rectangulars with given corner ornaments

this is the colour combo : green room by Ellen Silverman
(however the light green for the ceiling !)

darker green for the lower part and light mint green for higher part and ceiling

old tiles from another room could be used for the flooring

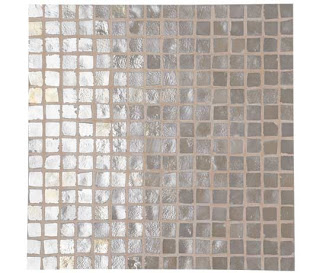
mosaic by Fired Earth - for the shower
(or waterproofed laquer)

utility sink by Kohler
(I would like two utility style sinks)

Decluttering my book shelf


While nothing is happening in our palazzo, I decided to do something in our appartment (where we actually live). Although the book shelf did not look too bad, I wanted to declutter it. Because I knew (what others could not see) that piled up pocket books were getting yellow behind more paperback piles. Travel guides were standing in two rows as well. There were books that I have read and will never read again. I only wanted to keep the books that I really liked - and maybe would read again.

So I started with the first cubicle and went book by book:
  • garbage --> pink box
  • give away to charity (or friends) --> white box
  • check and think again
  • keep --> back to shelf (after dust cleaning)
The pink box was filled up several times and I went several times to our paper recycling container. The white box was also overflowing at the end and I switched to a moving box. When I wanted to bring it to the church for a charity bazaar, I realised that most of the books where in English language. So I only brought the German books to the church and the English ones I gave a friend who works in the English liabrary and will use the old paperbacks for their own charity bazaar.

The only books I did not threw out were all my travel guides. Although there were lots of outdated Lonely Planet guides, I decided to keep them. Even the two from Cambodia, I kept them both. Maybe I am too sentimental. But aren't they documents of past times? My travel memories, including business cards of shops and restaurant.

Enough - here are my before and after pics:

before

before detail


after
Don't you see a difference ? Well, I have to admit, the second rows can't be seen in the before photo. But I know how many boxes I brought downstairs and how much lighter the book shelf feels now to me.

after detail
The travel section was not that easy : now I have Germany together with China, Italy goes with a rest of Italian books, rest of world and some Asia is combined while South East Asia has a cubicle for itself. There is potential for optimization. Next time.

Stairway : luster

Remember the discussion in my last post about where to hang the old and the new luster ? The old small lamp that we got with the house should hang again - like shown in the photo below - in our small entrance.


For the new luster I got a new idea ... please follow me upstairs :


Yes, just some more steps and we arrive at the primo piano, the 1st floor (BE) or 2nd floor (AE), where the space opens up a bit :


Here (above) you see some people happily together discovering the house (in August 2006), me on the left with our son.


And here we could hang the new luster.


The actual lighting would be replaced and the new luster could have a better effect here than downstairs at the piano terra, ground floor (BE) or 1st floor (AE). 

But how does this new lamp look like that my parents-in-law got from a fleamarket in the Veneto region ? I have only very poor photos, sorry, my mistake, did not set the right modus for the camera. So two blur pics :


It does look a bit better in reality.

To show from the outside of the house the two different areas of the stairways where we could hang the old and the new luster, I have prepared this photo :


Although the main door seems impressive, the main entrance really is a small area. The stairs starts almost right away. But upstairs the stairway widens up and leads to three spacious rooms and to small stairs that leads to the mansard and roof terrace.

As you are here to see the progress of our Italian renovation project, (me too BTW !) I will post before and after pics of the balcony of the stairways and the facade of the primo piano :

BEFORE

AFTER

Preserving the entrance luster

The entrance luster - Part I


The only "interior" that came with the purchase of the house is a small old luster. As you can see in the pictures above and below it consists of a simple yellowish glass sphere and a wrought iron fitting. Nothing precious. Probably not even 'antique'. But special to me.


The small old luster is hanging in the entrance of our house. Althoug the house is called 'palazzo' in Italian, the entrance of the house is not an 'entrance hall' - it is a fair small entrance and this small luster fits perfectly here.


During the renovation work in the house last year, someone took the luster down. And as you can see it did not become prettier over the past three years. It became more rusty, got some paint on it and a lot of dust.

During our summer holidays we never really can go ahead with remodelling or renovation work, not even with much planning or choosing material as everything closes down in the South of Italy in the month of August.

But this rusty luster was in the storage room where we stayed. And one day I decided to not go to the beach and instead to do a tiny tiny restoration project : "preserving the entrance luster".


I cleaned the glass sphere and the wrought iron fitting and bought paint suitable for iron. The name of the paint was 'ferro battuto' (wrought iron) and looked almost black. However, it turned out a bit too grey. But I decided to leave it this way for now and to put it away, back into storage.


The entrance luster - Part II

This winter in Venice, my parents-in-law had a surprise for us: A luster !  Antique for sure and nicely elaborated. A flea market find from an antique market in the Veneto region. For the palazzo in Pizzo.

"But not for the entrance" I heard myself, the ungrateful daughter-in-law, saying.
"Molto bello, grazie , maybe for the dining area" I tried.

They were quiet disappointed. I gave up - with a smile - knowing my father-in-law, who probably will install this luster before our arrival in summer ...


flea market find -  to hang in our house, somewhere

Luster no. 2  is about 3 x bigger than luster no. 1. - Probably it would suit the entrance of a palazzo better than the small luster (although the entrance is small). But still I am attached to the first, the original one. It was the only interior object we got with the purchase of the house. And as we do a lot of remodelling I thought to at least preserve the entrance luster at its original spot, in the entrance. - What do you think ? Should I give the second luster a try ? And find another place for the 'original' luster ? Or vice versa ?

Guest Blog: brighten up a rental with paint

*
Welcome to the very first guest blog on 'Palazzo Pizzo':
Text and pics are by Yvalie who has moved with her family of four from the US to Germany just recently.  I have met her through my blog as a dear reader and commentator. Over the time we became friends and each other's "interior coach" (amazing blogging!)
Here is Yvalie with her before and after story of her rented house :

--------------------------------------------


AFTER: the Art Nouveau Style entry after painting


BEFORE: the entry before moving in

Touching up a rental is not always easy if the landlord's answer to all your begging is "no". Well, I guess we were really lucky and were able to do some major changes just with some paint (and some flooring).

The house was built in 1905 featuring the Art Nouveau Style that was so popular in Europe at the turn of the 20th century.

The city of Dresden, located in the very East of Germany was heavily bombed during WW II. Those houses which still existed after the huge destruction had usually been neglected during the socialist reign of East Germany. After the German reunification in 1989 the real estate market boomed and everyone wanted to wake a sleeping beauty for a dime. Well, a lot of people were lured into investing and lost huge amounts of money. Others were more succesful and scored some fantastic architecture.


The authorities placed a lot of those old house under preservation order to protect what was still there. Until today you have to be in line with their rules for renovation. As annoying as this might seem, it does make sense though.

Since our paint color was not the original one we had no problem changing it.

We wanted to apply the same color scheme thru the whole house and started to settle on two different colors to paint the wooden trim and doors. So many people were helpful and offered tours thru their (similar) houses to help us make up our mind how to approach this kind of house.

We achieved another big impact by changing the lighting.

In Germany houses do not come with light fixtures. As a renter you can either bring your own or might be able to snatch a good deal from the previous tenants who don't want to bother taking all their fixtures down. We started our project with bare bulbs in every single room, bath, kitchen, basement, you name it.

Well, and then finally the biggest change was to bring in our furniture we have been collecting over the years and spruce it up with some IKEA and flea market finds.


When entering the house before it felt like entering a cave - so dark (see above 2nd pic). And I also did not like the busy tiles. They were not original anyway so we opted to cover them with a custom seagrass rug to match the one on the stairs. The Chinese console table is from a fleamarket. A guy travels to China three times a year and brings back those treasures to sell at various outdoor markets.


The dining room - before & after:


BEFORE Yvalie's changes


AFTER brighten up with colour


AFTER adding fresh colour

I tried to be very brave here and opted for a floral wallpaper in beige. Once up - I hated it! So after a few weeks we decided to just paint over it, since our budget did not allow to change it yet again. I have to say it turned out fine now. The wooden figures are from the artist Ingrid Wild www.ingridwild.com and represent our family.


The dressing room - before & after:


BEFORE : a bedroom before renting


AFTER: carpet and curtains out - wooden floor in and showing beautiful old windows

Due to it's northern exposure this room is quite dark, so we decided to use it as a dressing room. You usually will not find built in closets in German houses. We were lucky enough to have one spare room, so we would not end up with a huge cupboard in the bedroom. The white cupboards are PAX from Ikea, so is the rug. The sofa is an ebay find that originates from the same period the house was built in. The reindeer is from Pottery Barn Kids and I can not part with him after xmas. So he can hang out there for a while.

-------------------------------------------------------------------

Thank you so much to Yvalie for that great before & after presentation as well as for the short introduction to Dresden and the style of your house !
 
It is amazing what a difference some paint makes!
 
Talking so much about paint, Yvalie also has a good solution for keeping leftover paint:
 
Her metallic cans (Hornbach) neatly labeled with paint and location data were featured over at Lauren's Pure Style organization project (photo left).
 
More before and after pics by Yvalie can be seen today at Pure Style where she takes part in the 'coat closet - reader project'


photo source & guest blog : Yvalie
*


-->> For BEFORE and AFTER posts of our Italian remodelling project go here. <<--