every floor with different flooring - and where flooring is needed

Flooring, another subject to talk about. We have some areas finished, not sure how many % of the house (Angelo?, I guess less than 50%). To get an overview, I invite you to follow me through the house from the attic to the basement, since this is the chronological order of the renovation. Everything that needs decision is in red:

Attic:
attic living and kitchen area: white large oak wood panels 

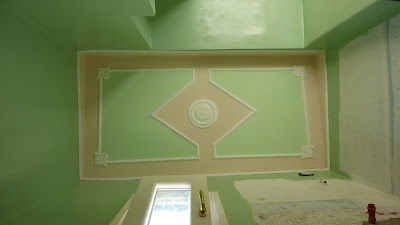
the new stairways of the attic (new layout!): travertine steps


Primo Piano:
Remember the layout inquiry? We have decided to lay the large wooden panels (natural oak) in the above way (changing directions in the corridor between the two bedrooms)

natural oak panels for the corridor and two bedrooms in the second floor

restored and polished old original tiles in our master bedroom

restored old original tiles in the soggiorno

the stairways going down towards the piano terra (ground or first floor)
we use same material as before: travertine

Piano Terra:

small entrance, floor is prepared, but tiles are not chosen yet

creative idea for the flooring of the entrance by Angelo:
using up some old original tiles, leftovers from the now master bath and son's room

DRAFT: it is supposed to look a bit like a "carpet"

Unfortunately we only have a few of the first geometric pattern and would fill the behind area with the floral pattern. We might need a border of terra cotta tiles or wooden panels framing this "carpet".

small entrance from above -  new pattern by Angelo forming big white and red crosses
 
same old tiles used in different room differently

Sorry for the bad picture (above), it's the only I have from the former room where these tiles were used before. Here they are tiled in a different pattern. However, we were told that it is not the right way, it should tiled like in the previous picture in the entrance, a pattern that shows large crosses. Not sure who is right or if there are any rules at all. I prefer the above flooring, although I only see that it is a more calm and small pattern. - Any suggestion, experience from my readers ??

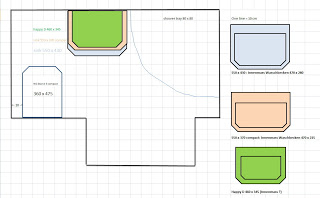
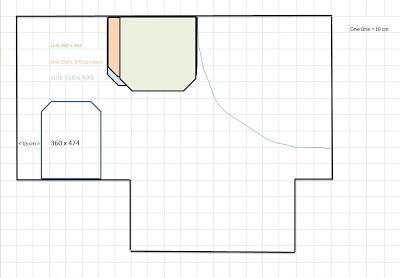
For a better understanding of the piano terra see the floor plan below. We have the small entrance in the middle and an "entrance room" on the left that leads to the living area.

old floor plan of ground floor (kitchen is bigger and bath has been moved)

I think to decide on the flooring, we need to think about our "routing" through the house.

We will not only pass this entrance when coming or leaving home through the main door. We will need to pass this entrance when coming down from the upper sleeping area to the living and dining area and kitchen on the ground floor - and back again. So, my thinking was, that the flooring of the entrance should "connect" the different areas. It is not a common entrance that leads to different apartments. It is a small entrance that belongs to an entire unit. That's why I am hesitating about Angelo's  idea of using the old tiles here. How about using terra cotta tiles on these few square meters and the same in the next room, that is our so called "entrance room", the room that leads to the living room ? In other words: Should above purple area gets same flooring? If yes, what to do with the old beautiful left over tiles? - Or two separate flooring?

The living and dining area will get a wooden floor. We just love the warmer touch of wood. The floor screed (Estrich) is ready:

view from living room over dining area to kitchen at the end

The next open point is: do we continue the parquet into the kitchen? If not, where do we stop? Or is a border of tiles around the working area enough?

Corridor between kitchen and bathroom: we have different possibilities: wood like in dining area, tiles like in the entrance (or tiles like maybe in the kitchen).

Semiinterrato:


stairways towards the guest apartment

This is an almost five year old picture, the stairs look still the same, but the walls are already done. The stairs might get the same travertine steps like all the other stairs. Not sure, if Angelo already ordered material here.

in the basement walls are done, but not the floors

the guest appartment with garden access and sea view - it will look so much better soon!

For the guest apartment in the semiinterrato, souterrain or basement, we plan a wooden parquet of large natural oak panels (from the same source like our neighbour?). Although we have to fight humidity, we thought that there are enough stones already on the wall that tiles are not an option. Also, terra cotta tiles would have the same problem with the humidity from below. Anyway, Angelo has a special construction in mind, a ventilation system, that he can better explain than me. When we come to this floor, I will post drawings and photos with more details. 

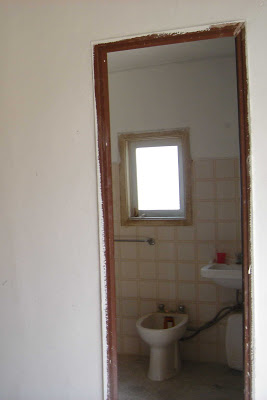
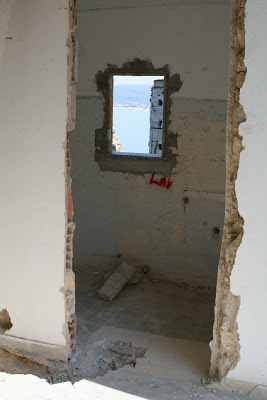
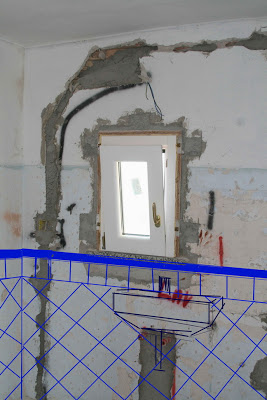
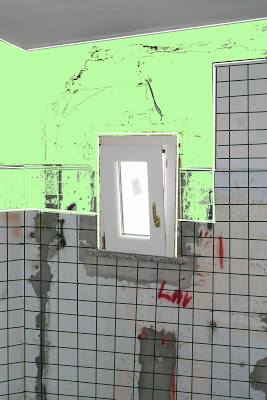
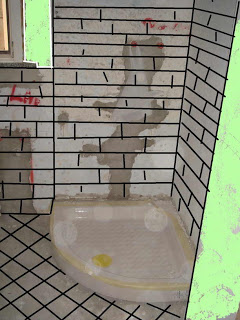
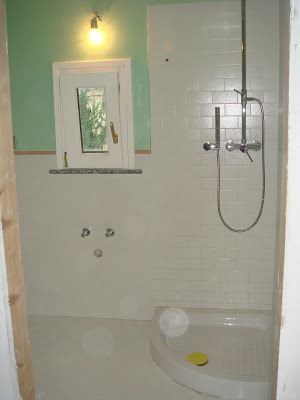
In this post I skipped the five bathroom floors, they are all tiled differently, but I wrote about this before. In case you would like to see more, follow the labels: bathroom, flooring, tiles and Before & After.

Please send me your suggestion, solution, experience, inspiration via comment below or via email to writing.suzie AT yahoo.com THANK YOU !

The red Bathroom

After a turquoise bathroom, a wild Vietri tile mix bathroom, a green bathroom and a tiny overhanging bathroom we now also can offer a red bathroom:

a WC in a cosy niche

the shower is in another niche, a space that was taken way from the bedroom to get a full bathroom out of the former restroom - between shower and sink comes a radiator (also for towels)

what about a rectangular mirror mounted upright ?


You see, the bathroom is not finished yet, but I cannot wait, I have to post these pictures to show the progress, since it's the guest bathroom and guests have booked their flights....

This standing WC has apparently no mounting height level problem. The shower will be - I forgot - one of those we bought in China (while living in Beijing). The red mosaic was chosen by my creative husband after I had run out of ideas. Also the flooring. He said he does not want just green and blue bathrooms (!)

Some previous posted pictures of the red bathroom can be found here - the name and source of the tiles as well as some old BEFORE pictures here.

What you have to know about WC mounting

When I was discussing with Angelo via mail about the appropriate size for a sink in the tiny bathroom, I asked him whether one could sit on the toilet without having a knee squeezed by the sink in front.

My calculation went kind of sort of like this: "Assuming the sink is mounted at 85 cm height, the sink bowl itself is 19 cm (according to manufacturer technical data sheet) and the toilet is mounted at 40 cm we have 26 cm minus toilet seat for the knee. This should be okay."

The next email that I received from Angelo was no good news and he sounded furious. Why? After having checked the tiny bathroom he found that the WC can only be mounted at 38 cm height, which is perfect for this case, he also had found that in two other bathrooms the plumber had prepared the toilet pipes far too low and that we would need to reopen the walls for adjustment!
However, one of the bathroom is already completely tiled!

technical data (by Duravit) for our WC

Bad News: toilet pipe installation too low !

You even can see from the picture that the toilet installation on the wall is low. In fact the mounting height would be only 35 cm. (With the recommended 40 cm you have 8 cm between floor and the toilet for cleaning, see technical data picture).

How this could have happened? It's the floor level that had changed tremendously in some of the bathrooms. I think in the green bathroom we raised the floor around 20 cm. Same happened in the bathroom in the basement. Apparently the plumber was not informed about the exact floor level - or the floor level was raised too much ? I think in the basement the later happened since we also planed to have a rain shower in a niche, that all in a sudden became a very low niche ... different story.

This coming week, Angelo will have a word with our plumber and architect. I am curious how to solve the problem. In the basement where the walls are still concrete, it should be no big intervention. And for the green bathroom I hope we do not have to demolish the wall with the SICIS (!) mosaic... If it is only for the cleaning and not for the function, I would probably leave it at 35 cm.

Since I am talking dirty, I mean, toilets, I would like to mention how important some centimeters / inches of a whole in the wall can be regarding WC seating height and comfort! Very important for comfort! In my first renovation back in Germany I had one toilet mounted at 43 cm height. For me it was quiet uncomfortable, since you sit at about 45 cm (including the seat). With the second renovation back in Germany I worked with the same plumber and told him right away for my new WC that I want to have it at 38 or 39 cm. (With the result, that my mob did not go fully underneath anymore. Just a few mm were missing.) So one would think with the 3rd renovation I should have known !!

BTW, in our former home in Beijing and now in Bangkok we have WCs by American Standard (stand alone pieces, not wall mounted) and they have seating height between 37 and 40 cm. Very comfortable. And thinking of the squat toilets, popular around Asia, which my Chinese doctor considers to be more healthy than the Western toilets (he thought digestion wise not hygiene), one should have a WC mounted as low as feasible.

Sink Thinking

After a month of holiday in tropical Thailand, Angelo is back on site. For the newcomers to this blog, Angelo is my father-in-law, which he is since 11 years now. We are lucky that he has time to supervise the renovation and not only supervise but also works hard on it. I hope he had a pleasant holiday ;-)

He just arrived and already found emails from me asking this and that. So for the tiny bathroom (190 x 140 cm), we still think sinks. To help with my decision, Angelo had the idea to position the already delivered sink from the basement here between the compact toilet (360 x 474 mm, not mounted yet) and the shower (80 x 80 cm). (Sorry for not having it in inches).


The above picture shows the Starck 3 sink that is 600 x 450 mm. It seem that the window sill (not in the picture, see previous post) has the same length. It would look good, when window and sink are in line, that the sink is not that much shorter then the tiny window above. However, this sink is too big!

And the toilet seems to me a bit too close to the wall, a few cm to the right would be more comfortable. In total 10-15 cm would be enough. The blue stuff coming out of the wall on the right side of the toilet provides hot and cold water for the hose (with spray head).

So I looked into my files and made a final drawing of the three last sinks that are still in the race. But not much longer. I feel that the Happy D (460 x 345) is too small. And the medium Starck 3 (550 x 370) has as well not much larger inner bowl (only 470 x 215 inner measurements, to wash your hands in). So I opt for the larger version that is 550 mm long and 430 mm deep. Which would be just a bit smaller than the sink in the picture above. About 2,5 cm on each side which is probably the frame. 


Any other suggestions, ideas?
How important is the sink in a bathroom? I would say the equipment most often in use. That's why it should not be too small even when the space suggests a tinier one.

The tiny overhanging bath or former outhouse needs the perfect sink

Can anyone tell me how they called these overhanging shithouses people used to have in the medieval times in European cities ? (and elsewhere ?) I do not even know the Italian expression for these tiny outhouse loos.

Anyway, we have one! And it is going to be our son's bathroom.
In my previous post I gave a sneak peek into the ongoing renovation. It is another green bathroom. We have ordered all appliances, except the sink. Advise is welcome!

But look and read from the start:

front facade of the house with the overhanging former outhouse on the right

 
a closer look at a BEFORE photo (we came a long way!)

above drawing by the architect shows the former privy on the right

the layout says the WC is 1,90 m x 1,40 m


above and below is the BEFORE bath,
there were a WC (left corner), a bidet and a sink


we took out everything (please note the "big" window)


with the help of an AFTER pic (note the former big and now shrinked window!)
I made some tiles planning


And finally, see and enjoy what Angelo made out of my amateurish drawings :


Shower tray, shower faucets and tiles are installed. Walls are painted. But what about the rest?

You may have noticed that the before bathroom had no shower, but a bidet. Now, we have decided that a shower is more important than a bidet. But we have another solution for "butt hygiene". We opted for one of the smallest WC, the Starck 3 compact model (360 cm x 474 cm), and will have a hose on the side of the toilet (like you often can find in Asia). This is simple, clean and space saving!

After all this, we still have not decided on a sink !
I have some tiny space saving sinks in mind and Angelo wants the largest sink possible.
Okay, I used to have a tiny Happy D sink (see pic below, no. 1) in my guest toilet in Germany where you almost only could have washed one hand after the other.


But the above Happy D (no 2) could do. It is 345 cm deep and 460 cm long - and it has soft round corners - ideal for a tiny kid's bathroom. But of course I can't decide just like this, quickly. There are other options by Duravit (and other manufactures for sure, that I have not checked), especially I thought of using the sink from the same series as the WC since we are in such a small room, it might be best to stick to the same design:


This sink comes in many sizes, but ours could be 450 cm wide x 320 cm deep (2 cm less wide and 2,5 cm less deep than the Happy D) or 550 cm wide x 370 deep, a compact version.

My sister has in her kid's bath room the above Starck 3 sink with metal console (480 cm x465 cm). Now, she lives far away from me and I cannot check if I would like it for our son. Not sure, the almost square sink and the metal console seems a funny match. But maybe a funny match is ideal for a funny bathroom?

I would rather prefer the little pricier sink Vero. This metal console allows to hang towels on both sides. The smallest size however is 500 cm x 470 cm.

once more the site : which sink matches best ???


Since we use no longer the service of an architect or interior designer, just Angelo and me are thinking of sinks. Actually, it is only me. Angelo would buy a big sink. So, it was me who asked for detailed measurements and Angelo came up with a rough excel sheet. He added the shower tray, which is 80 cm x 80 cm. And a WC (not delivered yet), that I corrected to the given size. Then I added different sizes of different sinks. It all seems quiet tide to me. Since Angelo hates tiny dwarf or smurf sinks, we agreed on the following: we wait until the toilet is delivered and he is mounting it. Then he would do some test sitting on the toilet and check possible sink shapes. From this test he would send pictures to me which would help me to make a good decision.

If anyone of you has a recommendation, has a similar bathroom situation and knows a solution, knows the perfect sink, please email me at "writing (dot) suzie (at) yahoo (dot) com" or leave a comment below.
Mille Grazie !