Before and After: How a tiny 2,6 m2 overhanging Toilet became a pretty Kids Bathroom


A bit over a year ago, I was planning the tiny overhanging bathroom that measures 1,4 m x 1,9 m (2,66 m2). Originally it was just an "outhouse" with a toilet, a bidet and a sink. But we wanted to install a shower - in order to have an "en suite bathroom" for our son's room.

And I have to say, I am really happy with the outcome!

tiny kids bathroom 2,6 m2

I had told Angelo (our "capo" and my father-in-law) that his grandson would like to have a "green" bathroom. And, that I like "subway" tiles. I designed the tiling for the floor and the walls. Angelo over exceeded our expectations by adding a stucco ceiling (that was not there originally)!

Since the sink is right below the window - where you have a nice view in the neighbours garden and over the sea - we needed to have the mirror installed beside the window.

Our young son does not use a mirror so far... So, I do not know whether this beauty mirror is too small or not. But it looks nice! It has the right size for this bathroom.

shower area 80 x 80 cm

If you wonder why we have a rain shower installed in such a small bathroom, then because we probably made a mistake when ordering the shower equipment back in China, where we were living at some point - a couple of years before this bath renovation.

But we were lucky, it just matches the height.

  small compact toilet
For the sink, I researched online the different sizes available for different models. At the end I choose a Duravit Strack 3 model, they have a lot of options. It is important for a small area to choose the largest possible sink - as it is a hassle to wash hands in a sink that is too small.

I even asked Angelo to sit down on the toilet (that was already delivered) and measure the space between his knees and the wall to make sure, there is still enough space between toilet and sink.

The two short blue tubes that stick out of the wall next to the toilet are the pre-installation for a water spray. In Italy it is common to use bidets in private bathrooms. But with the installation of the shower we really had no more space for a bidet. So we opted for the space saving water spray - yet to come.

The floor tiles are layed diagonally in order to optically strech the room.

"spider" shower curtain holder and "fish" hooks
In a shop in Vibo Valentia, we found these green "fish" hooks. There were only two left and I bought them. Angelo fixed them behind the bathroom door. In another shop I found the "spider" that is a space saving Italian solution for hanging the shower curtain.


And here is the old bathroom, BEFORE renovation, as we found it when we bought the house:

BEFORE toilet with bidet
The toilet itself was also very tiny before and squeezed into the left corner. The bidet was eliminated for our new bathroom layout. The sink was moved below the window to give space on the right corner for a small shower.

BEFORE renovation
The only thing that was bigger in this bathroom before the renovation and became smaller after the renovation, is the window! Strangely, the window frame is so massive that the new window is much tinier. Well, these are things you encounter when renovating, whether you are on site or thousand of miles away.

"outhouse" or overhanging bathroom
Our palazzo is over 200 years old, and at that time an outhouse toilet was common in European cities. You can still sea the remains on the side of many palazzi in Italy. But of course the toilets nowadays are linked to the public canalisation.

Colourful Folly


From Angelo's pictures that he had sent via email I knew more or less how colourful the house would be. But he did not send me pictures of every corner .... he left surprises for us.

When I entered the house again after three months absence, I felt like Alice in Wonderland... And while opening and unpacking the last boxes and walking ten, twenty times in and out of the living room, I started to feel dizzy. Was this the summer heat - or was this the impact of all those colours?

I imagine painting so many walls and ceilings day after day, all alone, must have become more and more boring for Angelo. And I can imagine how he tried out one colour and another colour. He must have become more and more frantic when shopping for colours - it must have been a kind of colour flush that had overcome him!

"Colourful Folly", I thought, must be the title of a post to honour this work, conveyed from the German expression "der helle Wahnsinn", that leo.org translated into "plain folly".

I count seven (!) different colours

(the blue of the ceiling is different from the blue in the arch (which also is spatolato technique) and I counted the white (border, doors, radiator) as one colour.)


I have some chairs to upholster with some not yet choosen fabric... I guess it need to be very neutral fabric ;-) ... Usually I prefer white walls and play with colours of fabrics, paintings, ceramics, flowers etc. But okay, Angelo was our painting master in charge and this is the South of Italy. Lets first move in and see how it feels. Before getting crazy, I might have to find a brush, as Angelo always says...

the sunlight makes the colour of the window alcove shine brighter 

A Bathroom Vision in Blue

A dream of a bathroom! How colours can change the atmosphere! Actually it is not just painted blue walls, it is spatulato, a Venetian technique for making painted walls shine like marble.

a vision in blue

blue and pearl grey wall colour harmonizes two different pattern of Vietri tiles on wall and floor

the lighter blue of the ceiling matches one hue of the wall tiles

the wall paint reduces the strong contrast (see before here and here)

stucco borders frame the painted areas

view from above (while painting the ceiling)

beautiful perspective of a blue bathroom dream

A "specialist worker" waxing the surface of spatolato finish in order to obtain a surface similar to polished marble.

Bath room with spectacular sea view

I wish I could be there! I have not seen it in reality yet. I only have these photos for now and have to wait for summer. 

What a dream in blue!

Grazie Angelo!! You are becoming the new Michelangelo with this project! Thank you for choosing the right blue and for spending so much time on the spatulato technique.

Colour Testing for the Living Area and Results

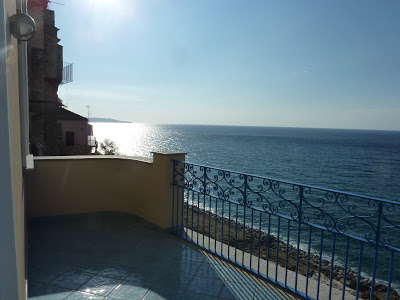
While I was still in Italy, we had to decide on the colour for the living area - which includes dining and kitchen since it is an open floor plan. We wanted something bold, something mediterranean. CC first thought of an orange-red, as we found this colour under a white paint coat and thought this might make sense. However, while in the room, we sented a red colour would distract too much from the beautiful sea view. "We should adjust the room colour to the outside landscape and use a blue or turquoise instead", we said.

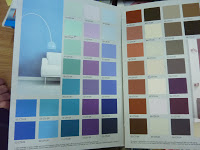
So, we went to a shop in Vibo Marina and looked into the colour palette:

The colours (left) are mixed by a machine on site and you can even get it in smaller pots to try out the result.

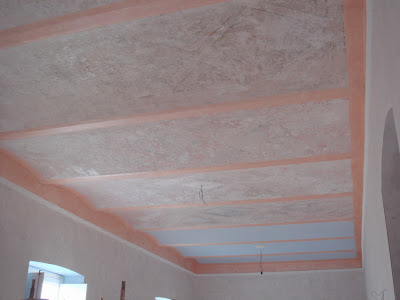
We chose two different turquoise blue, one more bluish and one more greenish. And for the cross-beams of the ceiling a rosty brown-red.


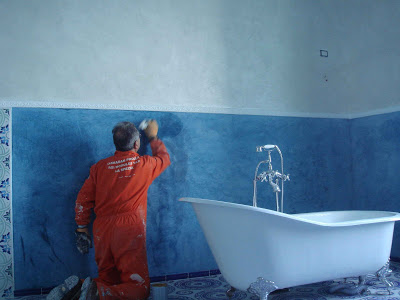
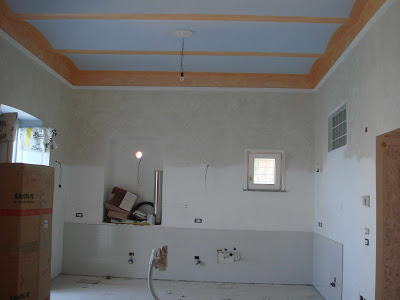
Here we go. Angelo has already done the two blue-greens for the wall and the brown-red for the ceiling beams and borders. Both colour areas are limited by a white stucco border.

colour testing result number 1

No... First, the ceiling border is too dark, too strong, too bold. Second, although we liked the blueish greenish walls, we felt it's too cold. It was April and it was still fresh outside and even more fresh inside the house. So we said, we better go for a mediterranean orange or a sunny yellow that, hopefully, will increase the felt temperature by maybe 1 or 2 degrees.

In Vibo Valentia we went to Enel Arena and chose some yellow and orange toners that were to mix with a certain quantity of white paint.

The new paint (left) is ment to give an antique effect due to the method of brushing unregular short strokes onto the wall. It also has some metal particles in it which was not really what I want, but it reflects light, and why not give it a try since Angelo was keen to work with that colour.


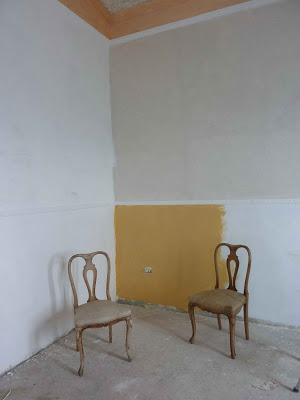
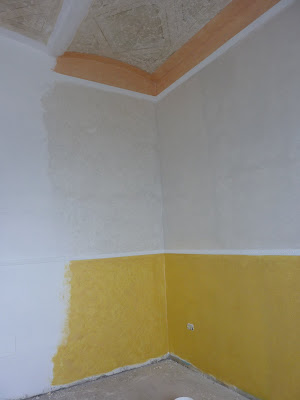
colour testing number 2

First, Angelo had to prepare the wall - again - by covering the previous blue colours (from the testing number 1) with white paint, wait another day for drying and then finally try out the new sunny yellow. Also the ceiling border got a lighter colour. It looks like flesh taint - or lets just call it "peach".


So, how about that orange like yellow? - And how do you like my two new chairs that I got for "free" from our antique dealer?

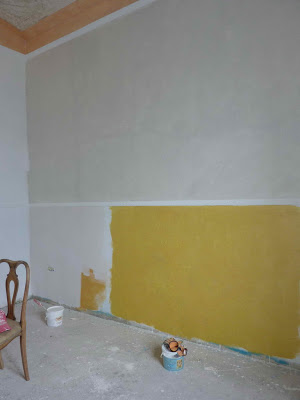
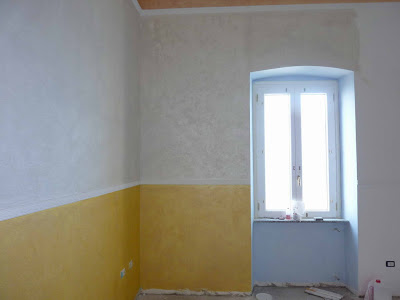
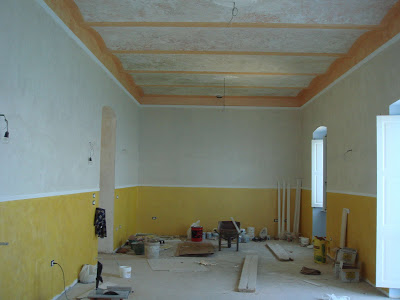
Colour testing number 3

But wait, we got another more yellowish yellow ! And note, that the wall above got a "pearl colour" paint!

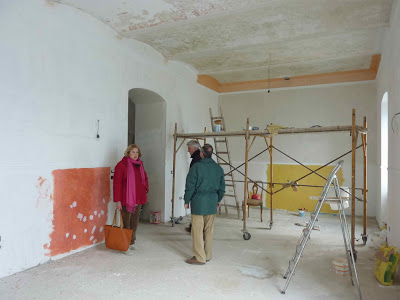
Colour test number 4

Or should we use the orange paint on the left wall? - It was the kind of orange-red we found underneath a coat of white paint while restoring the walls. - My mother-in-law matches quite well with the wall that day...


We decided to stick with that brighter yellow, sunny and warm. Colour number 3.

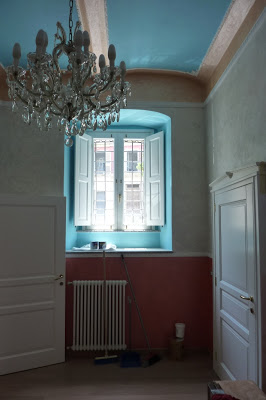
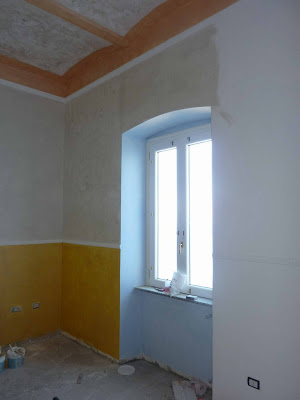
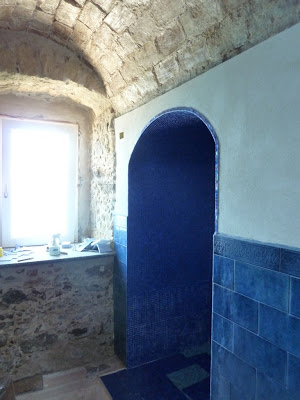
light blue in the window niche

And since we are into colour testing. How about some light blue? Angelo still has some left over paint. It looks good in the window niche.

The light blue window niche from a different angle.
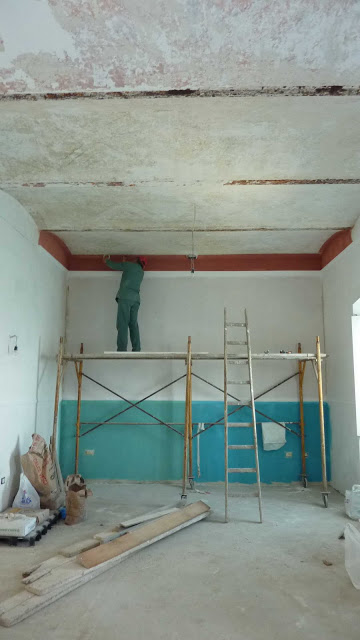
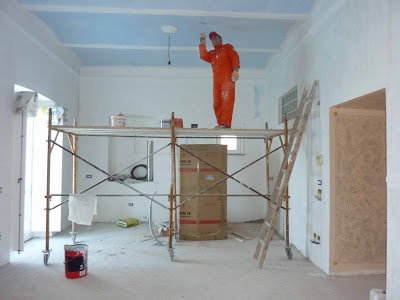
Angelo in action

Angelo is known to like blue... And since there was more light blue paint left, he continued to paint the ceiling, but only where no fresco was found. 

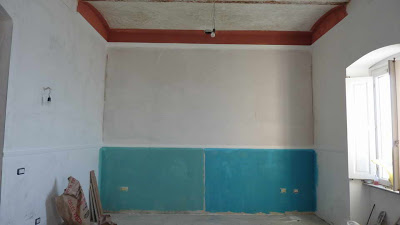
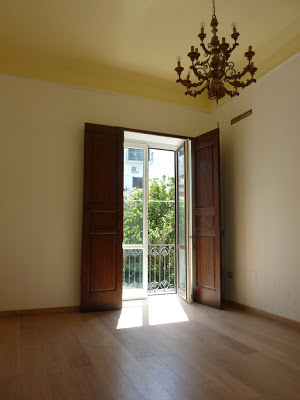
AFTER: ceiling finished, walls painted and prepared with tiles for kitchen

view towards dining and living area where the ceiling has some rudimental frescos


Now, we could muse if it looks good or not to have the yellow paint only until a hight of approximately 130 cm - and why not overall. I think, there are three reasons why to do it that way:
  1. The ceiling is quite high, maybe 3,50 m - With two or even 3 different colours and borders it "shrinks" a bit.
  2. The open space is kind of a "tunnel" with a length of 13,50 m and width of 4,50 m (before there were three diffrent rooms separated by walls) - The way the space was painted should open up the situation.
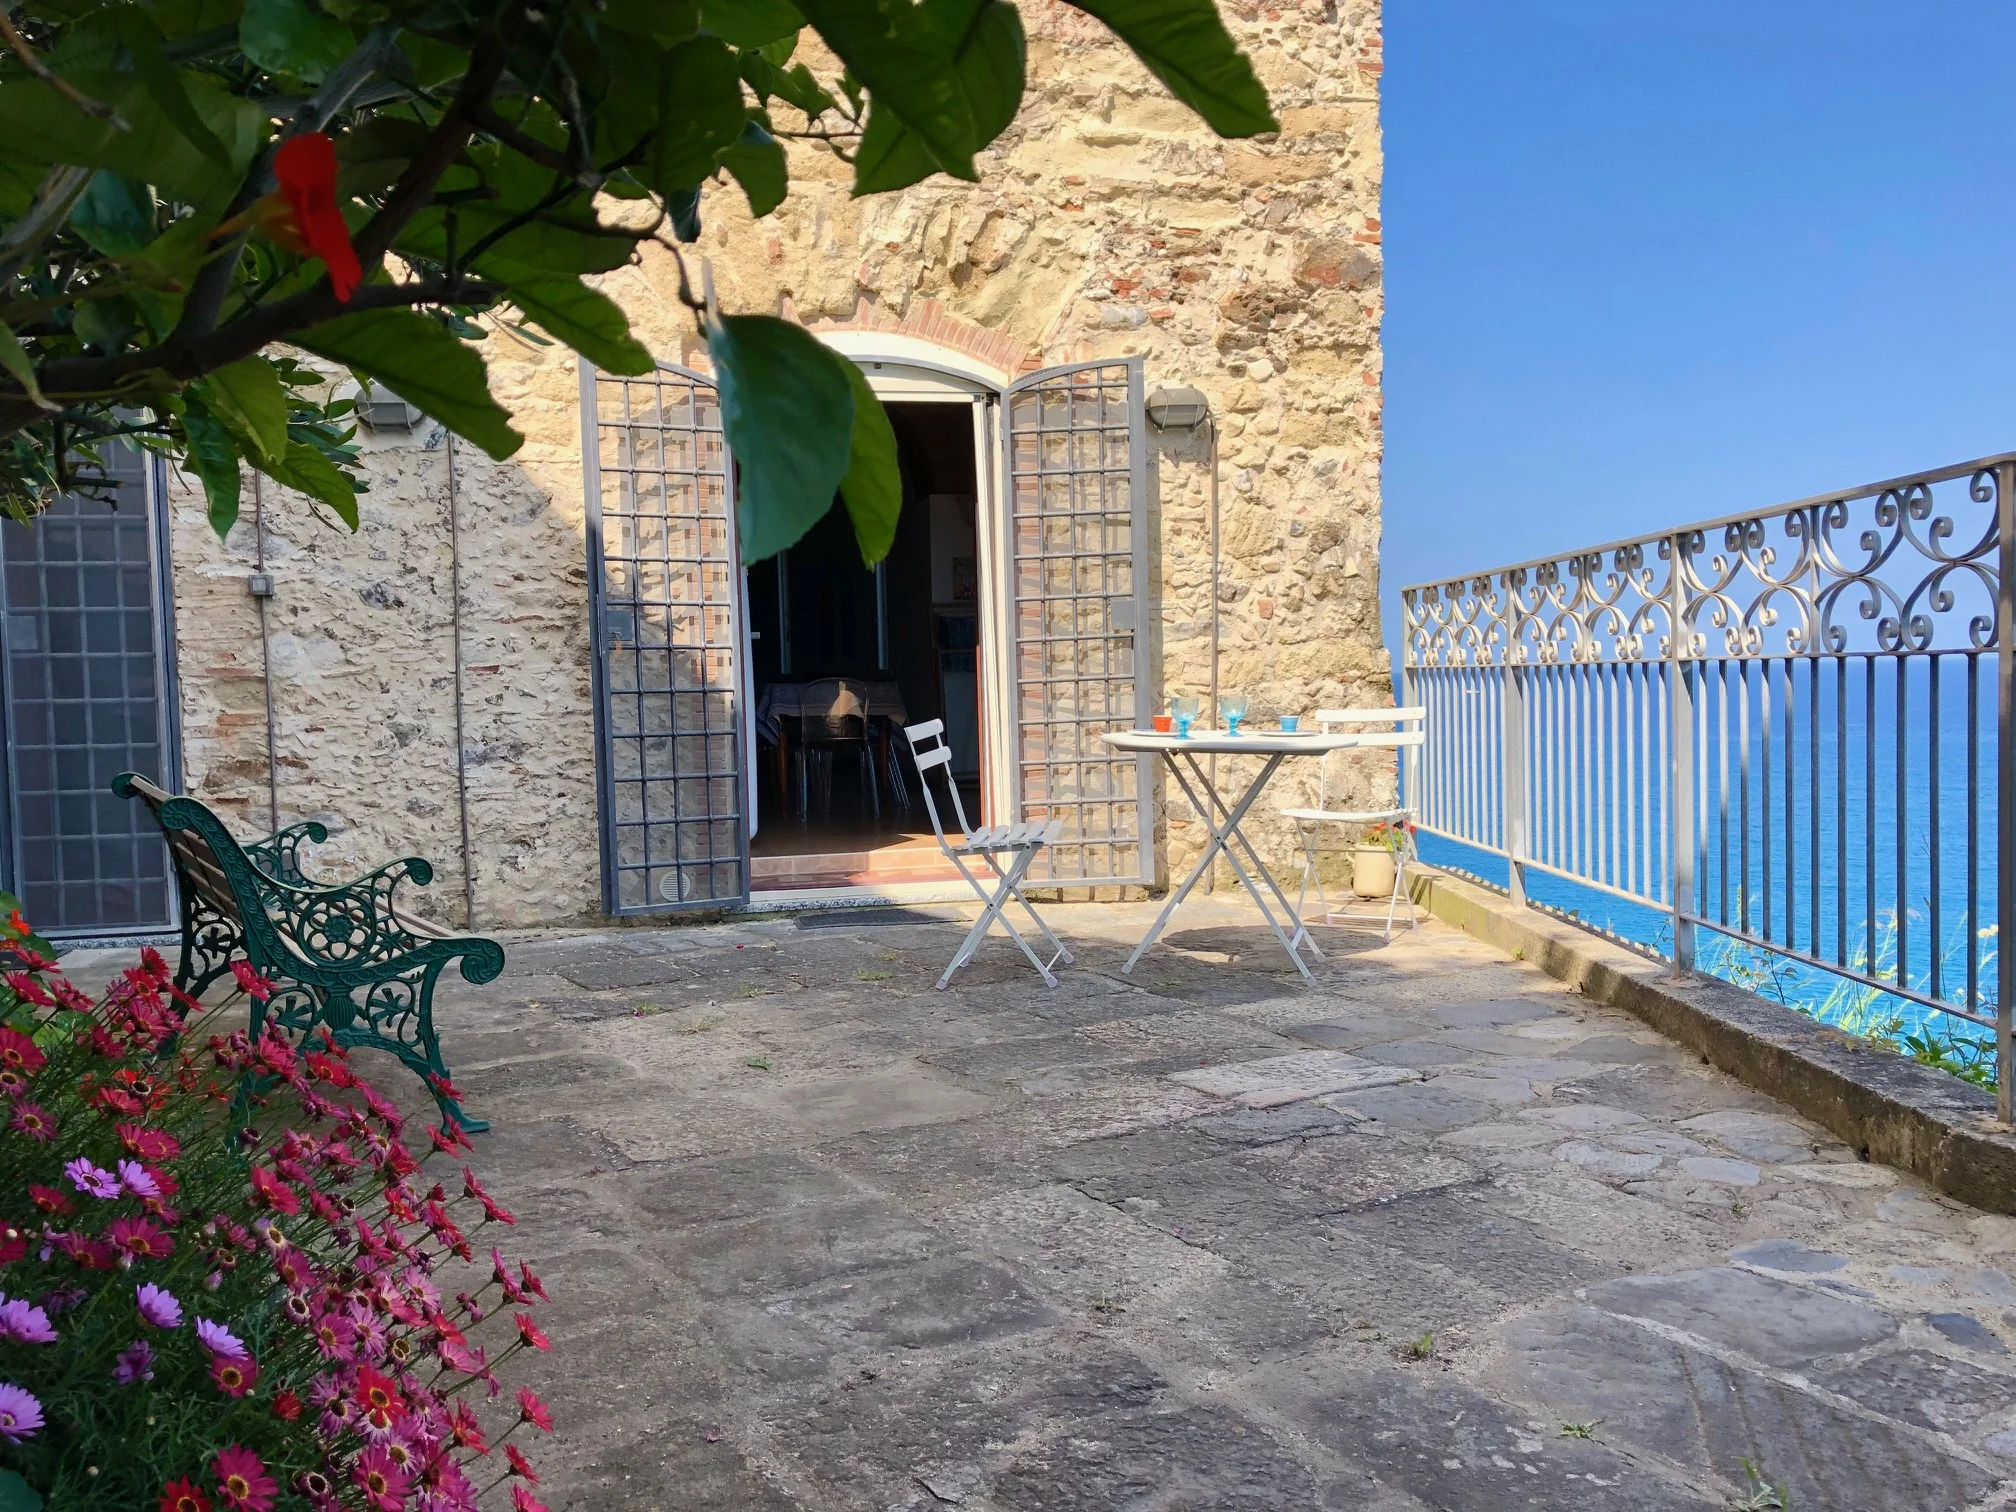
  3. I learned that an old Italian palazzo in the very South of Italy, sourrounded by more old houses and the sea, cannot be renovated with a Northern European thinking or even more with a modern taste. Of course you can add this with accessories or furniture later. But every single room needs some basics that reflects the Southern atmosphere, or something very Italian, or even old fashioned from passed centuries. Be it the floor, the walls or the ceiling. - When I am in this house, I want to feel the difference to other countries and cities, not only outside in the narrow alleys, also inside the house in every single room.
  4. In case we would need to re-paint the walls in a couple of years, we can think this over again... But the years will add cracks and marks, the colour will fade and patina will come and make it even nicer. 

The result of the ceiling - a work by Angelo

This ceiling of our living, dining and kitchen area, as seen above, was a work of several weeks by Angelo who laid bare the frescos - or what were frescos in the past -  with a special cutting tool. This worth a separate post with more details (coming soon).

Top 10 Impressions from the Renovation Work

In the last five days I have taken many pictures from the house and the work progress. Every day, I am on site measuring, looking into details, unpacking, helping whatever I can do. Yesterday, while showing friends around, I realized that I have some new favorite spots that I want to show you too:

My first favorite spot is the small sunny piazza infront of the house.
Here, at the main entrance three generations of (future) inhabitants are posing happily.

Angelo's art work at entrance #37

more stucco and paint art work on ceilings

my favorite bathroom in the vaulted cellar


good news: we found enough original floral tiles for the main entrance

measuring and calculating the floor space in the vaulted cellar (seminterrato),
we will have natural oak wook parquet since Angelo had insolated the floor perfectly.
It is difficult to say which is my favorite floor, but I really like this unique basement!

father and son at work in the living room
we bought stucco deco borders for the walls and sample colours to try out the effect (soon). Can't wait to see the trial paint on the walls....

my favorite room for the moment is our guest room with view into orange trees, the yellow of the ceiling is so warm and friendly - even the chandelier, that is not really my taste, can stay.

interesting perspective on the primo piano - the door frames turned out nice!

My favorite spot for the view is our balcony on the piano terra

Of course there are many more beautiful spots in the house, but these are the top 10 of the last five days. More is coming.